
Introduction
OpenClaw is an AI agent platform that enables users to create and configure AI agents for different tasks and workflows. It can be integrated with local AI models and external tools, allowing the agent to perform tasks based on user introductions.
In this setup, OpenClaw is installed on a Mac mini and configured to use Ollama as the local model provider. Ollama allows Large Language Models (LLMs) to run locally on the machine without entirely relying on cloud-based AI services.
The basic architecture of the setup is:
User → OpenClaw → Ollama → Local AI Model
OpenClaw acts as the agent platform that receives and manages user requests, while Ollama provides access to the local AI model that processes those requests.
Step 1: Check Mac mini environment
Before installing OpenClaw and its required components, verify the system environment of the Mac mini. This ensures that the operating system, processor architecture, and package manager are ready for the setup.
Check the macOS Version:
sw_vers

Then, check the Processor Architecture:
uname-m

An arm64 result indicates that the Mac mini is using Apple Silicon architecture.
Step 2: Homebrew Installation
Homebrew is required to conveniently install and manage software packages on macOS.
Install Homebrew using the official installation command provided by Homebrew:
/bin/bash -c "$(curl -fsSL https://raw.githubusercontent.com/Homebrew/install/HEAD/install.sh)"

Follow the instructions displayed in Terminal until the installation is completed.
Note: If Homebrew is already installed on the Mac mini, this installation step can be skipped.
After that:
brew install node
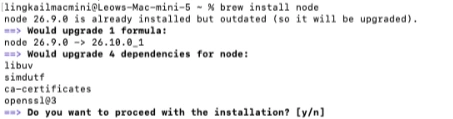
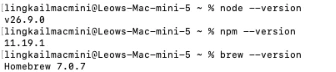
Then, verify that Homebrew is available:
brew --version
node --version
npm --version
Step 3: Install OpenClaw
After node.js and npm have been successfully installed, the next step is to install OpenClaw.
First, verify that npm is available:
npm --version
Install the latest version of OpenClaw globally using npm:
npm install -g openclaw@latest --allow-scripts=openclaw
The global installation allows the OpenClaw command to be accessed directly from Terminal.
After the installation is completed, verify the OpenClaw installation:
openclaw --version

If the OpenClaw version is displayed successfully, the installation has been completed.
Step 4: Set Up OpenClaw
Run:
openclaw onboard
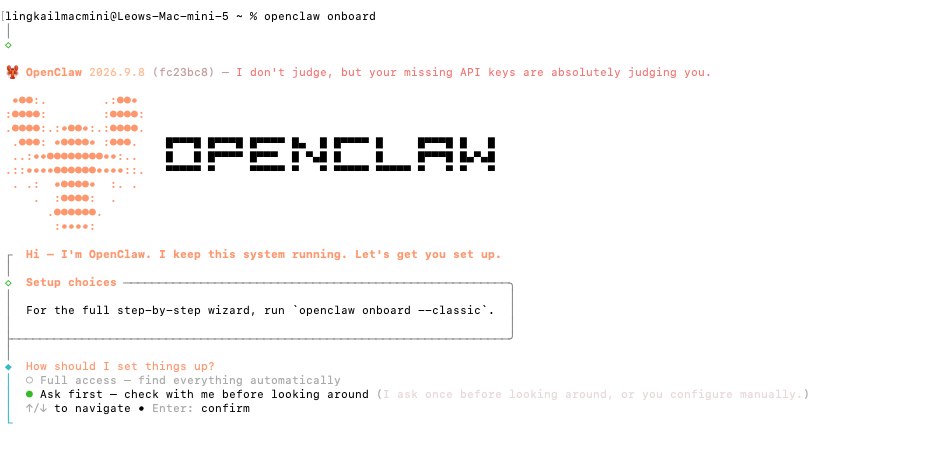
The OpenClaw onboarding interface will appear in Terminal. This interface guides users through the initial configuration process.
For users who want to view the full step-by-step configuration wizard, run:
openclaw onboard --classic
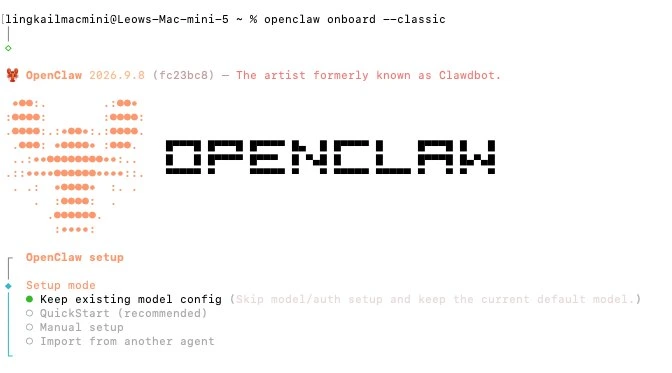
The Classic Wizard provides more configuration options and allows users to configure OpenClaw according to their preferred AI model provider and environment.
Step 5: Select the Setup Mode
When the Classic onboarding wizard starts, OpenClaw displays several setup modes:
Each option is intended for a different setup scenario.
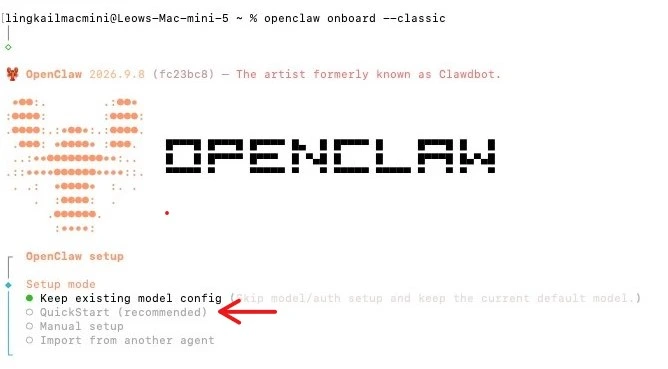
Keep existing model config keeps the model configuration that is already available in OpenClaw. This is useful when OpenClaw has previously been configured and the user does not want to change the existing model or authentication settings.
QuickStart (recommended) provides a simplified setup process using recommended settings. This is suitable for users performing a standard OpenClaw setup without requiring detailed manual configuration.
Manual setup allows the user to configure more settings manually and provides greater control over the OpenClaw environment.
Import from another agent allows an existing agent configuration to be imported instead of creating a completely new configuration.
For a new standard setup, QuickStart is generally the simplest starting point.
Step 6: Select an AI Model Provider
The next step is to select the AI model provider that OpenClaw will use.
OpenClaw supports multiple providers. Depending on the installed version, the available options may include providers such as:
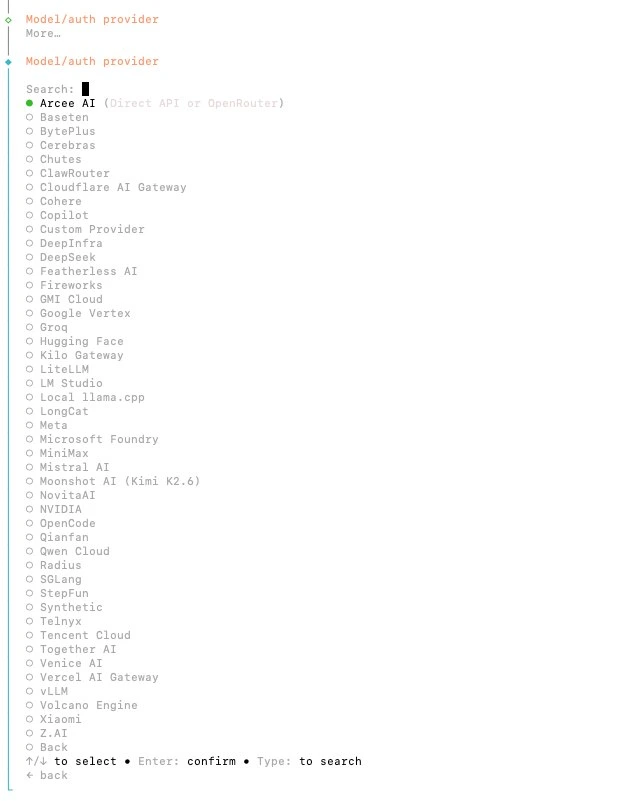
Selecting More... displays additional supported providers.
Note: The available providers and configuration options may vary depending on the OpenClaw version.
For this setup, I choose Ollama as my model provider
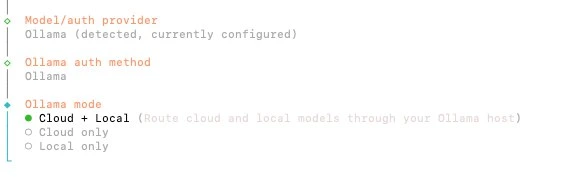
Step 7: Configure the Selected Model
After selecting a model provider, OpenClaw will display configuration options specific to that provider.
The required configuration may include information such as:
- Authentication method
- API credentials
- Model selection
- Provider endpoint
- Base URL
- Local or cloud mode
The exact options depend on the selected provider.
For this example, Local only is selected because the model is configured to run locally on the Mac mini.
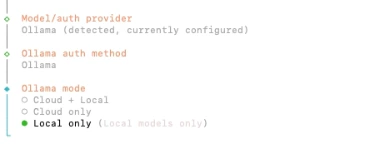
After selecting Local only, OpenClaw displays the local Ollama base URL:
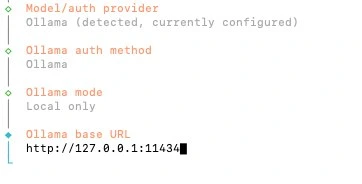
The default address can be retained when Ollama is running on the same Mac mini.
Note: This configuration is only an example using Ollama. The configuration options will be differ depending on the AI model provider selected during the previous step.
Step 8: Launch the OpenClaw Dashboard
OpenClaw provides a web-based Dashboard that can be used to interact with and manage the configured environment.
You can launch the Dashboard by two ways.
Firstly, copy the URL from the Terminal and paste on the web browser.
Second is by typing the command openclaw dashboard on Terminal.
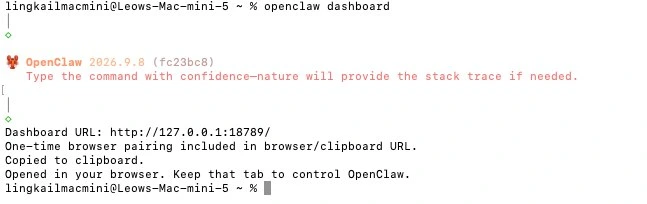
Here is the look of a successful setup of OpenClaw Dashboard:
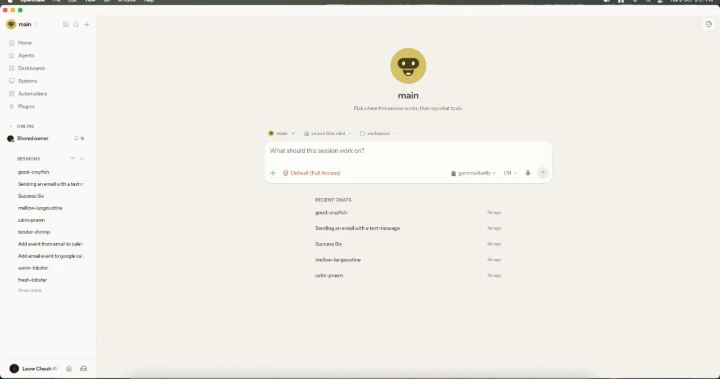
Step 9: Test OpenClaw
After opening the Dashboard, send a simple message to verify that the configured AI model is responding correctly.
For example:
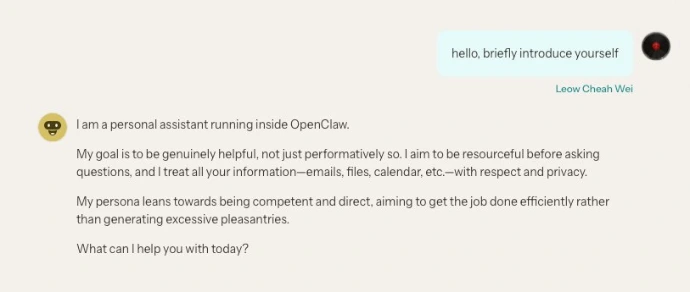
If the agent returns a response successfully, the basic OpenClaw setup is working.
Step 10: Verify the OpenClaw Environment
OpenClaw also provides several CLI commands that can be used to check the environment.
Check the installed OpenClaw version:
openclaw --version

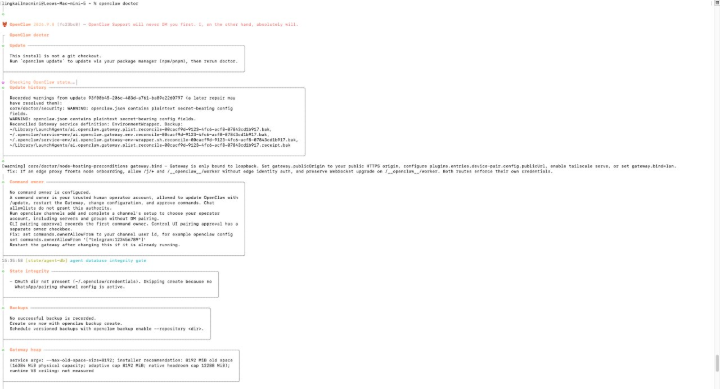
Check the OpenClaw environment for configuration issues:
openclaw doctor
Check the Gateway status:
openclaw gateway status
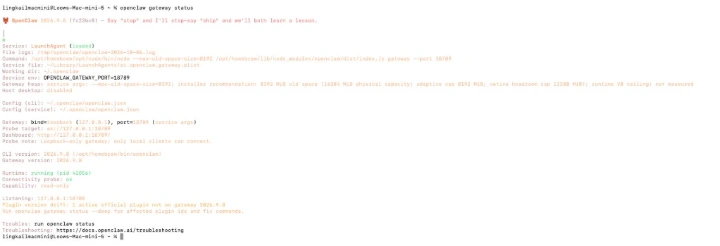
These commands are useful when verifying the installation or troubleshooting configuration problems.